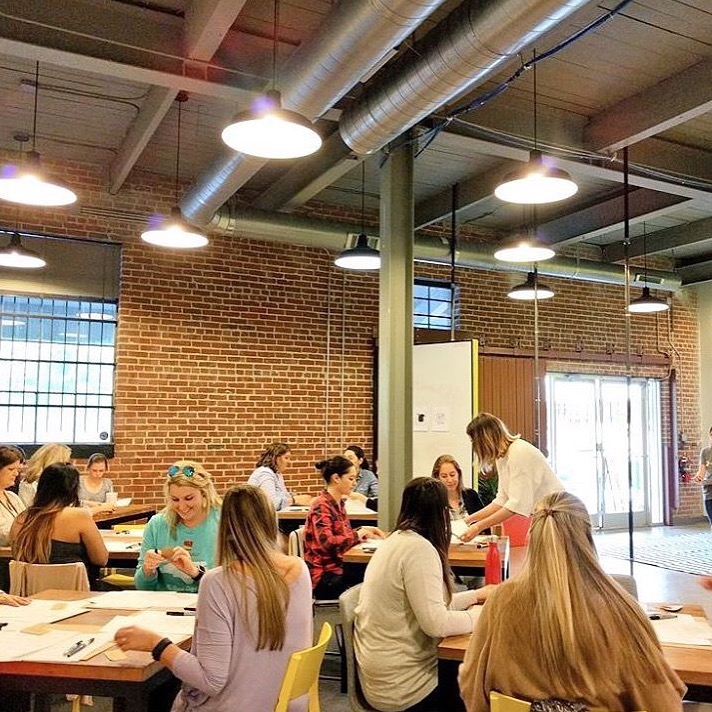
One of my favorite Charlotte discoveries is SkillPop. It’s a local startup that offers in-person classes to learn new skills, from watercolors to bread-making to mastering the at-home blowout. Each class is bite-sized and, best of all, inexpensive!
In the past I’ve looked into arts classes to get my creative juices flowing, but they were always such a big time and money investment. I can’t commit to $200+, 8-week courses, but I’ll definitely sign up for a 2-hour, $30 class on handlettering with my friends. It’s a genius concept.
Handlettering is one of those skills I wish I had learned before my wedding, but it has many applications. It’s a nice touch even if you’re just sending a friend a birthday card. But you can also turn it into a side hustle with an Etsy shop full of prints, mugs, and lettering services.
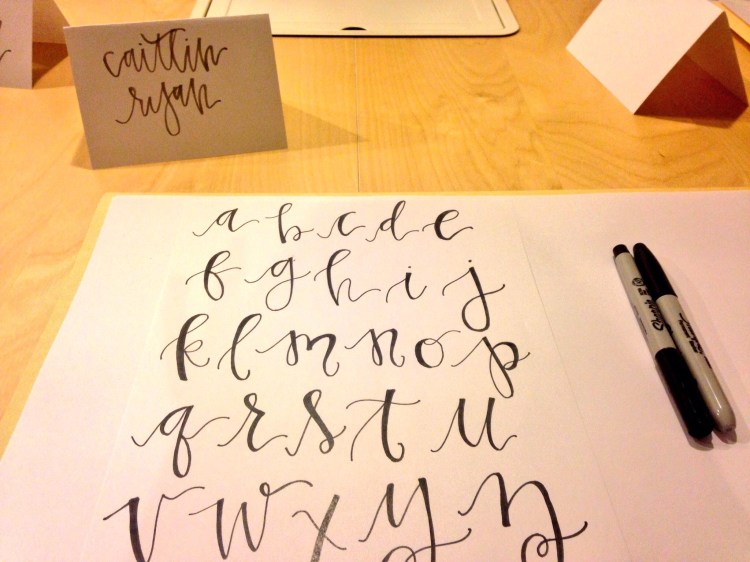
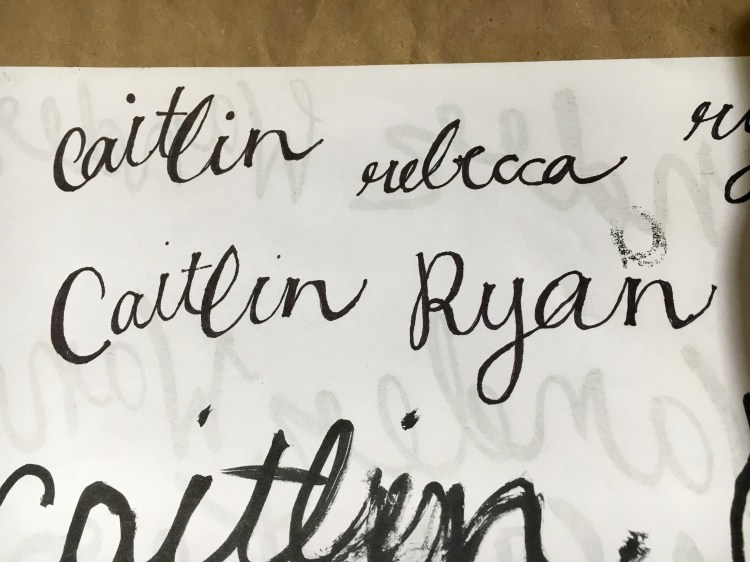
The first class I took was with Kaley Olson. She took us though the alphabet letter by letter and taught us first how to form it, and then where to go back and shade. Put simply, you shade on the downstroke, but there are little tricks to help letters look more even. My method is to write the letter once, then trace it, pulling the pen out wider on the downstroke. Then I go back and fill it in.
I’ll be honest – it’s not easy. Nothing from my first class was worth sharing! I blamed it on the fact that I’m left handed. But I also haven’t really used cursive in awhile so I needed to practice forming those letters again. I went home and practiced, practiced, practiced, and then I went back for round 2.
My second class was taught by Abby Miller of Voila Paper Co. This class was different in that she first had us practice plain old cursive. Once we got that down we moved onto freehand, which is basically freeform cursive. By that I mean you don’t need to stay on a straight line – some letters are up, some are down, some are big, some are small. This is where I started to struggle because I’m not loose with my pen.
The next step was calligraphy, which is what I practiced in the first class. It is the freeform cursive with the shading added in.
Lastly, we practiced brush, which you use a brush pen for. I’ll admit, I could not get the hang of that pen. I think I missed the part where you’re supposed to press down harder on the downstroke. (Can I blame my left-handed-ness again?)

Calligraphy is my favorite out of the four lettering types, and that is what I have been practicing at home. I figured out that the Sharpie Pen is the BEST and is now my pen of choice. While these classes help you to learn the method, you have to continue practicing. Sometimes I even write short phrases on post-its at work for a brain break in between assignments. It’s a fun little skill to have. Just don’t ask me to address your wedding envelopes – I’m not even close to that good yet!
